Saturday, August 14, 2010

The 10 things that have made parenting easier.

1. www.meetup.com this is simply a site dedicated to helping people start groups of people that have similar interests. There are all sorts of groups all over the country. The important thing here is that there are a TON of mom's groups on this site. I have met some of the most wonderful people through my meetup group, Kids at Play!

2. My Sling. I was given a Maya Wrap for a baby shower present. The friend felt horrible for giving me a "used" gift but it was probably the best thing I received. It happened to be an extra large but that turned out for the best because it allowed extra coverage for nursing, which my younger guy thought should happen 24/7. This was also the only thing that worked for those few months where I had 2 munchkins that couldn't walk.
creepy how much this kid looks like Linus


 3. The Soother. Find something that moves, lights up, plays music, and most importantly, is portable! Ours has lasted through both kids and two moves. It helped when we transitioned Lilly into her big girl bed. And it is like a trigger that lets them know it is time to sleep. It is also good for when you travel.


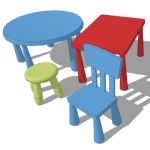
4. A really sturdy set of  kid-friendly table and chairs. And I mean STURDY! This just seems to keep them better organized sometimes. I got the Mammut collection from Ikea and I am very happy with it.


5. Crayola WASHABLE crayons. Yes, there are two types and washable is the way to go. But these seriously come off of everything. I have also come to love the dry erase crayons as well. I pack those and one of those cheap little board from target for out trips to the grocery store.

6. Foam bath soap. It resembles shaving cream but for kids. It comes in a huge variety of colors. As far as consumable bath products go, this stuff is the best bang for the buck. Bath crayons and paint are more expensive and do not last as long. Bath time at our house is when I get to tidy up or read a magazine when they were younger. I love it, and this stuff keeps it going for longer. The other advantage is, they can not fight over foam, too squishy.

7. Those super cheap kiddie pools form wallys world. Yeah they are like 10 bucks a pop so you buy two and fill one with a little sand and the other with water and you have HOURS of play, seriously, hours.
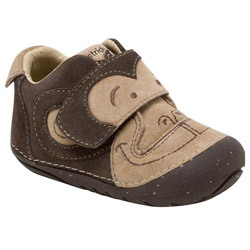
Striderite


8. Kid's shoes without laces. Does this need an explanation. All I can say is that yes Chuck Taylor's for kids are super cute but really????


9. The Bumbo. Totally my vote for the best new baby "must-have" in the last 5 years. It is easy to clean, helps you get work done, and you can use it as a feeding chair when you go places. Totally worth the money.


10. About 5 different strollers. I am sorry, but there is not one stroller out there that can suit every situation. This is particularly true if you have two young kids. The consignment sales are the absolutely best place to go to find what you need but as of right now we have: A single umbrella ($15 walmart), A full sized Single ($25 consignment), a full sized double ($75 consignment and we have been through 2), and hopefully soon a jogging double. Each one is best for different places and having the right one is the difference between having fun and feeling out-of-control.

Nicole is the winner of the needlebook giveaway. Congrats!

Wednesday, August 11, 2010

Final Installment of the Craft tutorial!

Time to finish this sucker up. Let's review, you should have everything cut out, your cover decorated (if you so choose), and the center-most page ready for binding.

The middle page is as simple as doing nothing, or stitch around the edges for embellishment and some  stabilization. This is the pink page in my pictures.


For the front and back cover:
Start off by making the the strap closure. Straight stitch the three layers together along the edges. I trimmed up the interfacing in the middle closer to the seams to give it a more polished look.On the end that looks the prettiest make a button hole for a button you have picked out or even a slit will do when you are using felt. (sorry forgot to take a pic of just this!)


I put down a piece to act as a strap to hold my scissors in place. I stitched the top and bottom of the purple piece, then placed it on the gray and stitch the side of the little holder.


Stitch just the top of the inner sheet of felt (gray in the picture) and place the outer piece of the cover (purple) and the interfacing together and stitch just the top of these two pieces together. Again this is to stabilize the pocket opening which is at the top.


Time to make a sandwich. Lay down the inside piece (gray) then position the non-buttonholed end of the strap on top. I put mine about 1/3 of the way down. Position it so that when you stitch down the side it will stitch the strap into place. Finally lay the decorated cover on top of it all. Stick a few pins in it all and stitch down the two sides and the bottom. All done with the pages!


Stack the three pages on top of each other. I know this step sounds silly.... but make sure the opening on the outer (bottom) page is at the top and the inside page is to the sides. Seriously. This is why the color of my cover changed (DUH).


Stick a pin or two in the sandwich and run it through your sewing machine down the middle. Slow and steady is the way to go here.


Finish it up by determining where your button should go. I stuffed mine full of the things I wanted it to hold and then marked a spot on the cover with a chalk pencil where the button would be best.   Then just stitch the button on. You can reach into the pocket to sew it on so you do not need to stitch through the inside material (gray in the pic). You have yourself a rather handy and super cute needlebook!


Ok, really, all you have to do is leave a comment to be entered to win one of these guys for yourself. In this post let me know what you would add to this design. You can also comment on the two previous posts for more chances to win. I will randomly choose a winner Friday (August 13th, creeeeeepy). Good luck and enjoy making one of your own if you do not win!


Monday, August 9, 2010

Tutorial Part II and a Giveaway!

Let's just dive right in! I am going to start from the inside of the book and work my way out. For the innermost page you will need:

7" x 5" interfacing (white in picture)
7" x 5" felt for outside of page (purple)
7" x 5" felt for inside of page (gray)
(2) 5" x 1" felt for embellishment (purple)


I designed this page to hold floss bobbins. It has 6 pockets that open on the side of the book.


Start off by stitching down both 7" sides of the inside of the page (gray in the picture) Do not stitch the top and bottom yet. This stitching is just to give the pocket some structure. I used a decorative stitch, but even a plain ole' zig zag will help keep the pocket from stretching out.

Pin the interfacing on top of the outer part of the page (purple). Stitch down the 7" sides of the page.

Now, make a page sandwich. it should go like this:
Purple
Interfacing
Gray

Stitch the top and bottom of the sandwich (along the 5" sides) 

Pin the purple embellishment stripes down at 2 1/4" and the 4 3/4" on top of the gray.


Stitch through the center of both purple stripes, parallel to the top and bottom. This should divide the page into three "tubes." Taaaa daaaaaa, pour yourself another glass of cab and let's move on to page # 2......  ok I lied tomorrow we tackle page 2. While you are stitching do not forget to leave a comment here (and on my previous post regarding this tutorial) to enter for a chance to win one of these made for you, hopefully with no wine stains. On this comment let me know what tool you use the most for stitching or embroidery. Every day of the tutorial is another opportunity to enter to win!

Sunday, August 8, 2010

Tutorial Part I and a Giveaway!

So I spent my next-to-the-last free weekend before classes start back up again perfecting a needle book. I am guessing that is the best thing to call this. Basically I wanted something to stash most all of my embroidery supplies. Here is what it looks like:


It measures about 3 1/2 by 7 with enough pockets that I haven't been able to fill them yet. For the record... this is evolution number three of this project, I am not so much of a pre-planner, but more of a trial and error with "I wish I would've...." moments kinda person. So for the smart ones out there who like measurements and step by step instructions, I took measurements, and get this, pictures. Lets begin. shall we?


The overview:
The book has a cover and two internal pages, which means three flat pieces with a seam down the middle. I used regular craft felt, but you are more than welcomed to use nicer felt. I think craft felt works well when used with interfacing. I am also a big fan of the more instant gratification of crafts felt being available in town. I used my machine to stitch most of this, with the exception of the pink stitching.


Materials needed:
5 sheets of craft felt (9x12 in.) *you can get by with less is you want less color variability*
Thread
Button (yes, I am partial to vintage here)
The items you want the book to contain


Cut list:
(3) 7"x7" pieces for the outside cove, one of heavyweight interfacing 
(1) 7"x6" piece for middle page
(3) 7"x5" pieces for the center page, one of heavyweight interfacing
(2) 5"x1" pieces to embellish center page
(6) 1 1/2"x3 1/2" pieces for strap closure, two of heavyweight interfacing
(3) 1 1/2x2 1/4 pieces for scissors holder (not shown in above pic), one of interfacing


The pages are designed for the things I like to keep. If there is a tool you want included then start thinking now how you want to stash it on the front cover page, because there is room there. If you want to adapt this for needle felting or some other fun craft then just try to plan as much as possible ahead of time. It really is easy if you think ahead (unlike me). Take the chance now to decorate the cover in whatever manner you see fit. I hand-cut a leaf motif, but I am sure you can think of something better.


While you are deciding how to decorate your cover leave a comment here to enter a drawing to win one of these needle books made be yours truly. In your comment just let me know what colors you think would look best for you. I will pick a winner by random drawing on Friday, August 13th (creepy, I know). This tutorial will be in three parts, which means that you have 3 chances to enter. Stay tuned!

Friday, August 6, 2010

finally friday!

I do enjoy my Fridays. On today's agenda, a vintage Better Homes embroidery kit that I picked up off of etsy. It is going to be something of a surprise as to what it comes out as. It says something about a pillow case or chair cover but I am going to see if I can work it into a skirt. If I am successful I will post pictures. If I am not, we will pretend I never spoke of this....

I think this is what I look like on Fridays too... soo excited I can't smile without looking like a cheeseball.
I will post something yummy this weekend.

Wednesday, August 4, 2010

A sense of accomplishment

Finally I have started a project and actually finished it. I know, a gold star for me right. It has been hard juggling working extra hours and doing the things a home maker should. I have just a couple of weeks until I am also back to school full time so I feel this rushed push to start a big project before it is too late. I am not working well under this pressure. Last night I finally sat down started a project AND finished it. It was something small but it is done.
I put this adorable little monster on a plain white tee that I had and didn't really like. The monster is clip art from a free digital scrapbooking kit from Craftastical. The direct link to her post with this kit is here. I really love her blog. Here is the basic how-to on this. I sized the clip are to what I wanted and printed it out.
I then traced the image using a light box (a window also works) and these iron transfer pencils:
I have to say Generals Transfer Pencils are easy to work with. This is what I came up with after tracing:


I just put it down on my shirt and hit it with a hot iron. It was easy because the image was pretty much small enough that it would fit under my iron but you might want to think about pinning it down if you will have to move your iron. After it was transferred I just began stitching using 3-ply floss and a hoop. Mostly back stitch, nothing fancy. You can find some good basic instructions here at Sublime Stitching. Anyways, this is a close up of the finished product:
Sorry my pictures have been cruddy. I updated my droid to the new Froyo OS and now my Vignette app is not focusing right. It is my fault for letting hubby install it before Verizon says it is time. I think he has more fun playing with my phone than I have! I leave you with a picture of a little buddy I found outside with the kids this evening.

Hubby wanted to keep him but I resisted. I was sure he would go the same way as the sea monkeys....

Monday, August 2, 2010

Things a Mother and Daughter Should Share

I believe that my top choice on this list is now Manic Panic in Rose Red. I picked up a jar when I recently had a serious dye job and keratin straightening.


I just touched up my roots and pulled the color through my hair to liven it up a bit. This is my opinion on the Keratin straightening. From my understanding the straightening was really just them filling in the texture in the strands of my hair with protein. It has been a couple of months since I had it done and I have to say I am generally pleased with my decision to shell out that much mulah at my local Ulta salon (I had a coupon but it was still expensive). It is not the all-natural miracle they claim it to be. It is stinky and made my face itch some but it completely changed the texture of my hair. In the stance of full disclosure I did not have super curly hair to begin with. I did have frizzy semi-curly hair that usually is very reactive to humidity. The biggest compliment I can say is that I have been able to wear straight bangs through July in the south. My hair dries quickly and is easier to style. I wear it down more than usual so hubby is pleased. It is wearing off some but I think I like it better now anyways. When it was first done my hair was too straight and I had to figure out how to add curls and body (a new challenge for me).
See... waaaayyy too straight!  
 Now it is easy to deal with and my bangs are better trained. I can just blow dry and go in like 10 minutes! woo hoo!

Me trying on glasses to help my buddy Stinky choose  :)
Should you do it? Not if you have super curly hair and are expecting a drastic change that lasts. If you just want to make it easier to style and eliminate frizz then yup. I think it might just be a summertime thing for me!

Sunday, August 1, 2010

Crafter's Block

I have been in something of a crafting slump. Yesterday I tried to make a few hair bows for Lillian. This is something that should be easy and relaxing for me. Nope, they all sucked. Bleh. I think I am going to blame this on my house being too clean to foster creativity. You see, we had people over this weekend for sushi night so I made sure the house was pretty darn clean, which is pretty unusual for me to be honest. Now all of my wonderful crafting juju is all too sterile. I cannot decide on what project to start and everything I have touched has turned to crap the last few days. I am boycotting my hot glue gun.
Any tips?

Thursday, July 29, 2010

Work, Work, and Work!

We had picture day at work yesterday :) I have only gotten to one picture with photoshop so far but here it is:

From left to right: Mr. Sheetz, Dr. Ciampa, Nicole, Tracey, Caitlyn, Me, Ashley, and Claudia!
I have some waaaaayyyy cooler ones coming along shortly! You never would have guessed but editing photos from an eye clinic means that you have to remove a ton of glare from glasses. Anyone have a trick for this?

Wednesday, July 28, 2010

While putzing around on Kruler this morning this was my favorite:


 I would love to make a dress for myself out of these colors! I have really been crushing on purples with grey recently. I think I might try to do my next piece with colors like these. The only catch is that it is hard for me to use grey when I paint. It usually ends up looking very muddy. Sounds like a fun challenge! It will probably have to wait until the weekend. Friday is Sushi night here so there are preparations to be made. Today is picture day at work. I am thinking that this means that tomorrow I might be able to swing working from home to get the pictures up on the website *crosses fingers* I would love to be able to spend a whole day in my PJ's right now. That is something I miss about being a stay at home mom. I hope everyone has a good day.

P.S. Send good thoughts to my buddy Ericka today :)

Tuesday, July 27, 2010

4th Friday Downtown

On the 4th Friday every month the Fayetteville Downtown Arts Council puts on this little event where the business downtown open their door for later hours and various artist and artisans sell their goods or just get their face out there. This is one of my favorite things here in Fayetteville. In the past it has just been a great free event to pack up the humungo double stroller and let the kids do something different. This month the Feral Arts Collective I am a part of put on a display. We had a blast and I even finished a piece I am extremely happy with :) Here are the pics from the event. I was soo busy working that I was unable to take pictures so these were all hijacked from Christina Cole, a photographer extraordinaire and a fellow Feral Artist.
Our Booth. Thanks Alyssa for our super cool sign!


Progression through the evening. I usually like to work with encaustic (fancy word for colored wax) but I was afraid it would melt in the heat. It was refreshing to have to change the way I usually work
Then there was this guy......

Finally, here is the finished piece:
Well I am going to be late to work. Until next time!