Showing posts with label Tutorial. Show all posts

Monday, August 9, 2010

Tutorial Part II and a Giveaway!

Let's just dive right in! I am going to start from the inside of the book and work my way out. For the innermost page you will need:

7" x 5" interfacing (white in picture)
7" x 5" felt for outside of page (purple)
7" x 5" felt for inside of page (gray)
(2) 5" x 1" felt for embellishment (purple)


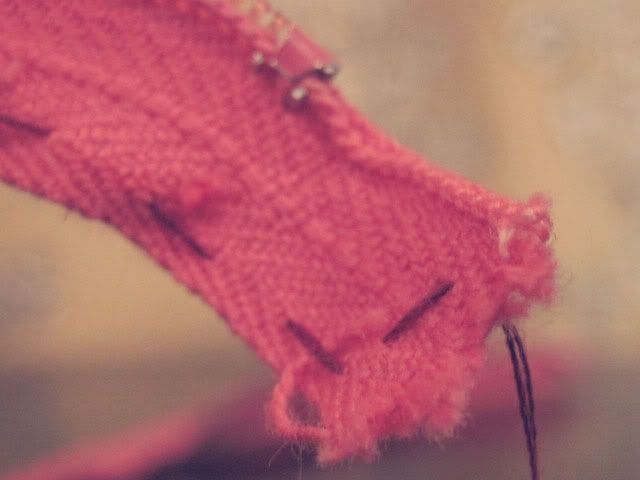
I designed this page to hold floss bobbins. It has 6 pockets that open on the side of the book.


Start off by stitching down both 7" sides of the inside of the page (gray in the picture) Do not stitch the top and bottom yet. This stitching is just to give the pocket some structure. I used a decorative stitch, but even a plain ole' zig zag will help keep the pocket from stretching out.

Pin the interfacing on top of the outer part of the page (purple). Stitch down the 7" sides of the page.

Now, make a page sandwich. it should go like this:
Purple
Interfacing
Gray

Stitch the top and bottom of the sandwich (along the 5" sides) 

Pin the purple embellishment stripes down at 2 1/4" and the 4 3/4" on top of the gray.


Stitch through the center of both purple stripes, parallel to the top and bottom. This should divide the page into three "tubes." Taaaa daaaaaa, pour yourself another glass of cab and let's move on to page # 2......  ok I lied tomorrow we tackle page 2. While you are stitching do not forget to leave a comment here (and on my previous post regarding this tutorial) to enter for a chance to win one of these made for you, hopefully with no wine stains. On this comment let me know what tool you use the most for stitching or embroidery. Every day of the tutorial is another opportunity to enter to win!

Sunday, August 8, 2010

Tutorial Part I and a Giveaway!

So I spent my next-to-the-last free weekend before classes start back up again perfecting a needle book. I am guessing that is the best thing to call this. Basically I wanted something to stash most all of my embroidery supplies. Here is what it looks like:


It measures about 3 1/2 by 7 with enough pockets that I haven't been able to fill them yet. For the record... this is evolution number three of this project, I am not so much of a pre-planner, but more of a trial and error with "I wish I would've...." moments kinda person. So for the smart ones out there who like measurements and step by step instructions, I took measurements, and get this, pictures. Lets begin. shall we?


The overview:
The book has a cover and two internal pages, which means three flat pieces with a seam down the middle. I used regular craft felt, but you are more than welcomed to use nicer felt. I think craft felt works well when used with interfacing. I am also a big fan of the more instant gratification of crafts felt being available in town. I used my machine to stitch most of this, with the exception of the pink stitching.


Materials needed:
5 sheets of craft felt (9x12 in.) *you can get by with less is you want less color variability*
Thread
Button (yes, I am partial to vintage here)
The items you want the book to contain


Cut list:
(3) 7"x7" pieces for the outside cove, one of heavyweight interfacing 
(1) 7"x6" piece for middle page
(3) 7"x5" pieces for the center page, one of heavyweight interfacing
(2) 5"x1" pieces to embellish center page
(6) 1 1/2"x3 1/2" pieces for strap closure, two of heavyweight interfacing
(3) 1 1/2x2 1/4 pieces for scissors holder (not shown in above pic), one of interfacing


The pages are designed for the things I like to keep. If there is a tool you want included then start thinking now how you want to stash it on the front cover page, because there is room there. If you want to adapt this for needle felting or some other fun craft then just try to plan as much as possible ahead of time. It really is easy if you think ahead (unlike me). Take the chance now to decorate the cover in whatever manner you see fit. I hand-cut a leaf motif, but I am sure you can think of something better.


While you are deciding how to decorate your cover leave a comment here to enter a drawing to win one of these needle books made be yours truly. In your comment just let me know what colors you think would look best for you. I will pick a winner by random drawing on Friday, August 13th (creepy, I know). This tutorial will be in three parts, which means that you have 3 chances to enter. Stay tuned!

Wednesday, August 4, 2010

A sense of accomplishment

Finally I have started a project and actually finished it. I know, a gold star for me right. It has been hard juggling working extra hours and doing the things a home maker should. I have just a couple of weeks until I am also back to school full time so I feel this rushed push to start a big project before it is too late. I am not working well under this pressure. Last night I finally sat down started a project AND finished it. It was something small but it is done.
I put this adorable little monster on a plain white tee that I had and didn't really like. The monster is clip art from a free digital scrapbooking kit from Craftastical. The direct link to her post with this kit is here. I really love her blog. Here is the basic how-to on this. I sized the clip are to what I wanted and printed it out.
I then traced the image using a light box (a window also works) and these iron transfer pencils:
I have to say Generals Transfer Pencils are easy to work with. This is what I came up with after tracing:


I just put it down on my shirt and hit it with a hot iron. It was easy because the image was pretty much small enough that it would fit under my iron but you might want to think about pinning it down if you will have to move your iron. After it was transferred I just began stitching using 3-ply floss and a hoop. Mostly back stitch, nothing fancy. You can find some good basic instructions here at Sublime Stitching. Anyways, this is a close up of the finished product:
Sorry my pictures have been cruddy. I updated my droid to the new Froyo OS and now my Vignette app is not focusing right. It is my fault for letting hubby install it before Verizon says it is time. I think he has more fun playing with my phone than I have! I leave you with a picture of a little buddy I found outside with the kids this evening.

Hubby wanted to keep him but I resisted. I was sure he would go the same way as the sea monkeys....

Monday, April 26, 2010

Zipper Rosette Headband Tutorial *Part 2*

Now it is on to the actual assembling of the headband. You do have some options as far as the headband base. At a craft store you can find "blank" headbands in all sorts of widths. I like these thin metal ones that I found at a grocery store of all places. The nice part about these is that you can leave them plain so the band blends in more so the headband looks like one of those little hats. Here is the basics of what you need: 


For this particular headband I used some wide ribbon and folded it in 1/2. I then stitched up the side of the ribbon to form a pocket.


I slid the headband into the pocket. To finish off the ends I wrapped embroidery floss around the bottom very tightly.


All that is left is to glue the flowers on the headband using a little hot glue. There are no hard or fast rules on this! 


As far as toppings go, use anything you have stashed away. On this headband I used a typerwritte key. Here are some other items that work well:


On the original headband, I used thin ribbon and I wrapped it around in a spiral. I put a dot of glue periodically to help the ribbon stay in place.


Here is an example of a teal and brown headband I made using buttons and trim. I left the headband plain except for some alcohol ink to turn it brown.


I think this is becoming an addiction! I did get my supplies organized last night. The sight of this just makes me smile!


As always any questions, shoot me a comment!


Sunday, April 25, 2010

Zipper Rosette Headband Tutorial *Part 1*

As promised in this post, I have made a few zipper rosettes and taken a ton of pictures. This post will explain how to make the individual flowers, and my next post will tell you how to out it all together to make a headband. I saw an adorable rendition of this headband by Taza, and I was inspired! I just so happen to have a ton of zippers from my Nana, many vintage.


When shopping for zippers for the rosette you should go with various lengths. You should also look for zippers made out as natural of fibers as possible. The ones with real twill sides definitely work the best but we can work with anything. I also had some with exposed metal teeth and these come out with so much texture. Anyways after you have selected your zipper it is time to deconstruct.


You have 2 choices, cut off the bottom of the sipper or remove this little metal piece with pliers. I typically try to do this because it makes for a more finished end and gives you more length to work with.

 Now you have your zipper in 3 pieces. (I am saving the little metal doo-dads for another project)


Next you plan out which end of the zipper is going to be the middle of your flower. I like to use the end that has the prettiest metal piece as the center of the flower. Tie a know at the end of your thread, I like to double up my thread for this type of stuff. Start at the end that will be on the outside and do a running stitch (up down up down) until you reach what will be the center of the flower. Keep the stitches pretty close to the non teeth edge. These stitches do not have to be perfect!


When you get to the end that will be the center do just one stitch towards the zipper part. This will help the flower look more finished.


Next, pull the thread and push the zipper down towards the knot. This is where practice helps. You don't want to have the zipper completely curly but at the same time you don't want it too straight. The more slack you have the flatter your flower will sit. The tighter the thread the more funky the flower will look but it will be harder to put together.After you get the tension you want, tie a know but do not cut your thread.


If you are using a shorter zipper (less than 10 inches or so) just hold the center and wind your flower up the way you want it to look. Make sure your needle is on the bottom side, then make a few stitches that span the whole radius of the rosette and pick up a piece of each layer. I would do this two or three times in different directions.


If you are using a longer zipper you just start at the center and go around one layer at a time. As you go around make a stitch here or there that tacks the new layer in place on the old layer. With longer zippers, it is important that you push the zipper material up towards where you are working, or you will get to the last 3 inches of the zipper and it will be a super curly mess. you want the ruffles to be as evenly spaced as possible.


Play around with both tension and irregularity. I think they look better the less round they are.


If you have any questions just shoot me a comment!