Saturday, May 22, 2010

I know just enough to get myself in trouble

Well another project completed:


On the pattern it looks more like a cute bowling bag-like purse but because I messed up somewhere (still trying to figure that one out) it is a little squatty looking. Oh well.. It is still a super functional purse that doesn't look 1/2 bad.


Everything always looks better if you throw a filter over the photo :) Here is what I learned from this project:
  1. I need to do a MUCH better job of transferring  those funny little markings from the pattern to the fabric
  2. My sewing machine is not a fan of 12 layers of fabric especially when 4 of those are faux leather
  3. If you have really cool one-of-a-kind vintage fabric wait to use it on a pattern you have made before and you know you love
  4. I need to refresher course in sewing!
Here is a close up of the fabric I picked up during this trip:
It was a table runner I believe but there was only about 1/3 yard to work with. I am still happy with how much I got done in 36 hours (without an all nighter!) Next up is a gray striped dress that I will work on this week.

On the home front, today was an awesome day. Shopping, Chick-fil-a, and the park were all included! Here is a pic of the new "Bubble Generator"

The inventor of this toy is my new hero! Tomorrow is a cookout and cleaning around the house!

Thursday, May 20, 2010

taaaaa daaaa.....

Check out the prowess of the new sewing machine :) Okay, maybe this dress does not fit amazingly well or is that impressive but still. I really wore it to work today! woo hoo *pats back* Ok enough about that... now the pros and cons of my new machine so far:

PROS:
  1. Even though it has a fancy digital screen it is still a basic Singer at heart, meaning all of the stuff I have learned about sewing still applies
  2. Didn't have a single problem with tangling or tension
  3. I can stitch little doggies if I so choose
CONS:
  1. I know I was probably going VERY slow but if you go too slow on the pedal it stops and you have to completely lift your foot off to get it to start again.
This is a recap of out evening:

Why so Serious? 

No sewing tonight. I stayed up waaaay too late last night finishing that dress. Tomorrow I will get to another project :)

Oh... P.S. that was See & Sew pattern B 5339, Fabric was a cotton from Joann's

Wednesday, May 19, 2010

New Sewing Machine!!!

Holy cow it has been a bit since I have gotten a chance to blog! I have been doing something creative almost everyday but NOTHING is finished or turning out how I would like. But, the biggest reason nothing is finished is because I have been mostly cutting out patterns for sewing (which I am out of practice on) I am super excited because my brand new sewing machine is coming in the mail today! (Why doesn't work offer new toy days of leave?) I decided on the Singer 7470 Confidence. Taaaaaa Daaaa....
Here was my thought process on that:

  • I wanted something digital (because I suck at tension setting and the likes)
  • I wanted to go ahead and spend a bit of money
  • I was going to get a viking Emerald model but the SUPER helpful local shop said that Singer makes Viking and the lower end Viking models are not all that amazing.
  • I didn't just want to pay for the name brand
  • This guy had great reviews
  • What a sale! I love saving a buck :)
Well tracking says it will be here today. Yippie... but this is me at work today I am sure:


Here is a peek at the first thing I plan on making on my new baby:


Well time to go work for the man. I am sure I will be burning the midnight oil playing with my new sewing machine and hopefully have something more to show you tomorrow!

Sunday, May 9, 2010

A skirt for Lilly

I finally got a chance to finish up a wrap skirt I was working on. A few weeks ago we were at the Dogwood festival here and one of the vendors had these really chic wrap skirts. She wanted $40 for them and the quality was not great so I figured I could make one myself. They were one side with contrasting waistbands and she had stenciled poppies or whatever on the outer flap. I had this faux leather stuff here for a purse project that I had misplaced the pattern to so I said "why the hell not" and used the leather-ish stuff.


I cut a skirt for myself and then also a skirt for Lillian. (yes, she was the guinea pig!) All it was is a rectangle with rounded bottom corners. I then attached a long tie piece that was a stretchy knit. This worked to keep it up as a waist band. I am not thrilled with this pattern for her skirt I might change it, what do you think?
I used bias tape around the edges because my machine (nor I) had any desire to try to hem the thick leather-y stuff. I made some felt flowers and topped them off with vintage buttons.Oh a HUGE thanks to Angry Chicken for the bias tape tutorial found HERE.
Now, I am sure you are asking yourself, what about the big skirt... Well the answer is that it is going to be that purse after all. I found the pattern and my skirt just looked like crap on me because the material was too heavy. I knew that was going to be the case but I tried it anyways! Have you ever started a project and used the wrong material but you thought it would work out in the end because you really wanted it to? Oh Well! Lilly has a cute skirt and I have learned my lesson... for now. If you have any questions about the specifics just let me know! Oh, almost forgot (how could I?) the felt flowers were inspired by Princess Lasertron!

Tuesday, May 4, 2010

antique adventures

While I was in Wytheville I stopped off at Snoopes Antique mall and a few others. This place was awesome! I have a confession here, I have a love-hate relationship with shopping for antiques. I LOVE it but... I am allergic to rodent pee. Funny, right? So I avoid areas with books and the such but by the end of the trip I was hitting the benadryl hard.  Anyways here are some pics:


 Sadly, I didn't get Mr. Robot there because he was a little costly. I did however pick up some buttons, baubles, and really cute fabric that you will see pop up here shortly. I almost broke down and bought a library card cabinet, but it was a little smaller than I wanted. I am holding out for a HUGE one (in my dreams, right?) What is your dream antique find?

Sunday, May 2, 2010

productive day!

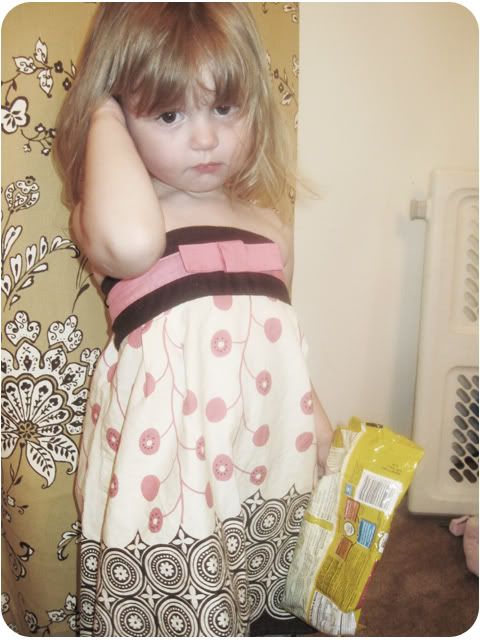
I got so very much done today and it rocked! I was able to clean up my studio some and I uncovered my sewing machine. I have been stashing away some of my old shirts from before I had babies (mostly tube tops) I finally made the effort and turned them into dresses for Lillian today. The before of the fist (and my absolute fav):


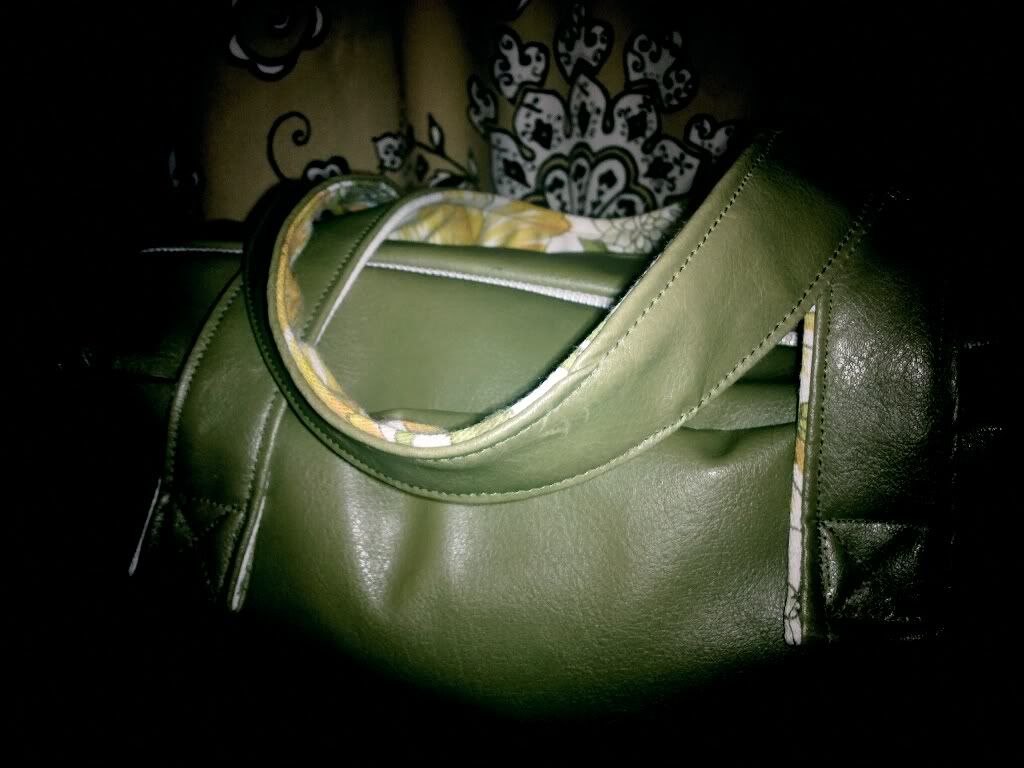
This one had a zipper up the back. I took the zipper out and closed the seam. Then I folded the top down and added elastic in the back. The original shirt was from Charlotte Russe. Here are the after shots:


Yes, we had to bribe her with chocolate morsels to get her to actually try the dress on. She seriously is not supportive of me making waaaaaay cute stuff for her!


Here is the back of the dress.

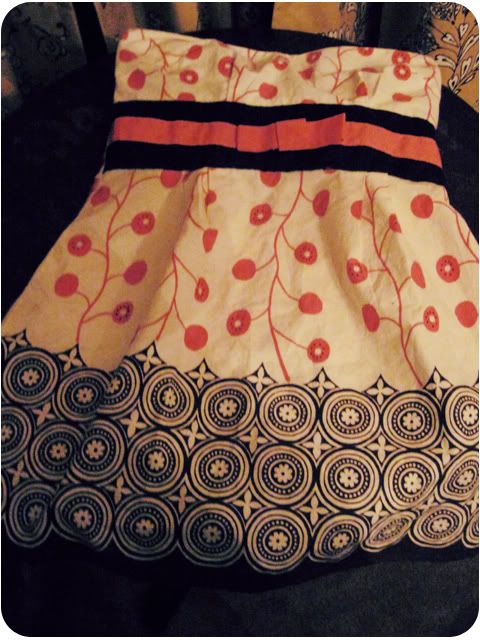
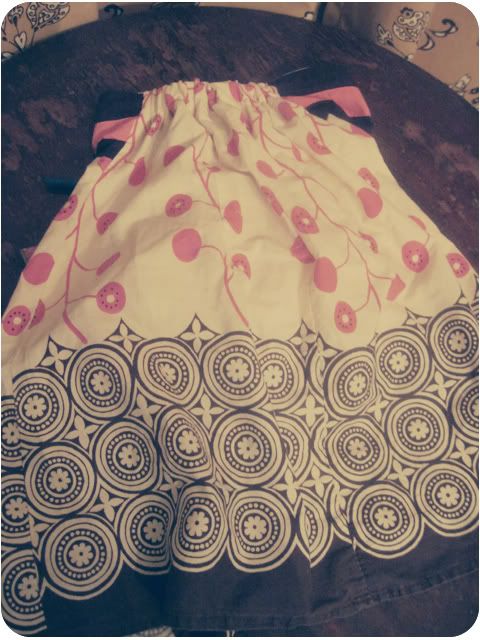
I measured her bust and then subtracted the size of the front 1/2 of the shirt. I then cut a piece of elastic to go the rest of the way around her bust measurement. This was a pretty easy solution because it wasn't major sewing. The good part is that it was tight enough I didn't need to make straps. I can also make it bigger by just replacing the elastic. After I finished this one I worked on another tube top. This one I changed up quite a bit, but I think it still needs some ribbon or something. It is not finished:


It was just a straight across tube top (sorry no real before pics) so I cut down into it for a neckline and cut the sides for sleeves. It was easier than I thought. I turned the raw edges under and viola'. I used one of her current dresses to figure out how big to cut everything. Ask any questions in the comment section!

Well, what could top a day of getting to play? A night of fun art stuff! I met up with the other artists in the Feral Arts Collective. We have some really cool shows in the works! I will post more on that later.


The real work week starts tomorrow. Oy Vey! I hope everyone found an excuse to be creative this weekend!

Saturday, May 1, 2010

project gone haywire!


Last week I got a new case for my Motorola Droid. It is pretty awesome in all of it's hot pink goodness but I thought it needed a little more, ya know? Well I broke out the Shiva paintsticks and this awesome robot stencil I had and went to work:


I chose Shiva Paintstiks because they are actually oil based but easy to work with and good for stencils. I thought they would work on my non-porous phone cover. This is what it looked like right after I was done:


Way cool right? I let it dry for 24 hours like the package said. I am not patient but I resisted the urge to touch it! My daughter got a hold of it and smudged it but I was able to easily clean it up with a little olive oil on a fine point q-tip. After it was dry I used a paint pen to outline it in black. This is it after a week of use:


ARG!!!!! does anyone know what would be the best medium to use on my rubbery Droid cover? Help I have an unreasonable desire to make this look like my own but I can't seem to find the follow through! Comment below if you have an idea to make this work. I will try all suggestions and post my updates here!

Oh, FYI the stencil is out of the book Stencil Me In by Marthe Le Van (one of those I had a 40% off coupon but only needed $2 notions so I picked this up lol)