Thursday, April 29, 2010

Wytheville, VA

I <3 old buildings

At a Funeral

Why does the word funeral start with "fun". Sorry bad humor! I am at a funeral but not for someone I was close to. It is still a sad place. Anyways I hope everyone is having a great week! I wenk antique shopping yesterday so pics to come.

Wednesday, April 28, 2010

On the Road

Well we have hit the road and are heading to the western part of Virginia. I am excited for the mountians to start poping up here soon. We might even go whit water rafting, who knows? The kiddos are doing well on the drive (thanks to the dramamine for Lilly's car sickness) anyways, better pictures to come, for now.... my feet!

Monday, April 26, 2010

Zipper Rosette Headband Tutorial *Part 2*

Now it is on to the actual assembling of the headband. You do have some options as far as the headband base. At a craft store you can find "blank" headbands in all sorts of widths. I like these thin metal ones that I found at a grocery store of all places. The nice part about these is that you can leave them plain so the band blends in more so the headband looks like one of those little hats. Here is the basics of what you need: 


For this particular headband I used some wide ribbon and folded it in 1/2. I then stitched up the side of the ribbon to form a pocket.


I slid the headband into the pocket. To finish off the ends I wrapped embroidery floss around the bottom very tightly.


All that is left is to glue the flowers on the headband using a little hot glue. There are no hard or fast rules on this! 


As far as toppings go, use anything you have stashed away. On this headband I used a typerwritte key. Here are some other items that work well:


On the original headband, I used thin ribbon and I wrapped it around in a spiral. I put a dot of glue periodically to help the ribbon stay in place.


Here is an example of a teal and brown headband I made using buttons and trim. I left the headband plain except for some alcohol ink to turn it brown.


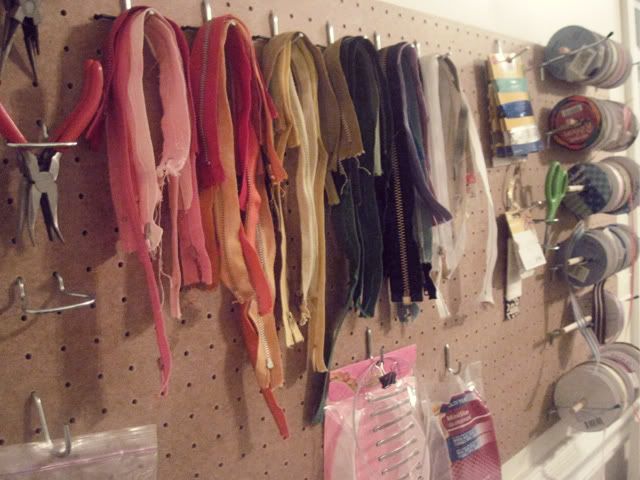
I think this is becoming an addiction! I did get my supplies organized last night. The sight of this just makes me smile!


As always any questions, shoot me a comment!


Sunday, April 25, 2010

Zipper Rosette Headband Tutorial *Part 1*

As promised in this post, I have made a few zipper rosettes and taken a ton of pictures. This post will explain how to make the individual flowers, and my next post will tell you how to out it all together to make a headband. I saw an adorable rendition of this headband by Taza, and I was inspired! I just so happen to have a ton of zippers from my Nana, many vintage.


When shopping for zippers for the rosette you should go with various lengths. You should also look for zippers made out as natural of fibers as possible. The ones with real twill sides definitely work the best but we can work with anything. I also had some with exposed metal teeth and these come out with so much texture. Anyways after you have selected your zipper it is time to deconstruct.


You have 2 choices, cut off the bottom of the sipper or remove this little metal piece with pliers. I typically try to do this because it makes for a more finished end and gives you more length to work with.

 Now you have your zipper in 3 pieces. (I am saving the little metal doo-dads for another project)


Next you plan out which end of the zipper is going to be the middle of your flower. I like to use the end that has the prettiest metal piece as the center of the flower. Tie a know at the end of your thread, I like to double up my thread for this type of stuff. Start at the end that will be on the outside and do a running stitch (up down up down) until you reach what will be the center of the flower. Keep the stitches pretty close to the non teeth edge. These stitches do not have to be perfect!


When you get to the end that will be the center do just one stitch towards the zipper part. This will help the flower look more finished.


Next, pull the thread and push the zipper down towards the knot. This is where practice helps. You don't want to have the zipper completely curly but at the same time you don't want it too straight. The more slack you have the flatter your flower will sit. The tighter the thread the more funky the flower will look but it will be harder to put together.After you get the tension you want, tie a know but do not cut your thread.


If you are using a shorter zipper (less than 10 inches or so) just hold the center and wind your flower up the way you want it to look. Make sure your needle is on the bottom side, then make a few stitches that span the whole radius of the rosette and pick up a piece of each layer. I would do this two or three times in different directions.


If you are using a longer zipper you just start at the center and go around one layer at a time. As you go around make a stitch here or there that tacks the new layer in place on the old layer. With longer zippers, it is important that you push the zipper material up towards where you are working, or you will get to the last 3 inches of the zipper and it will be a super curly mess. you want the ruffles to be as evenly spaced as possible.


Play around with both tension and irregularity. I think they look better the less round they are.


If you have any questions just shoot me a comment!


Friday, April 23, 2010

Spring Cleaning

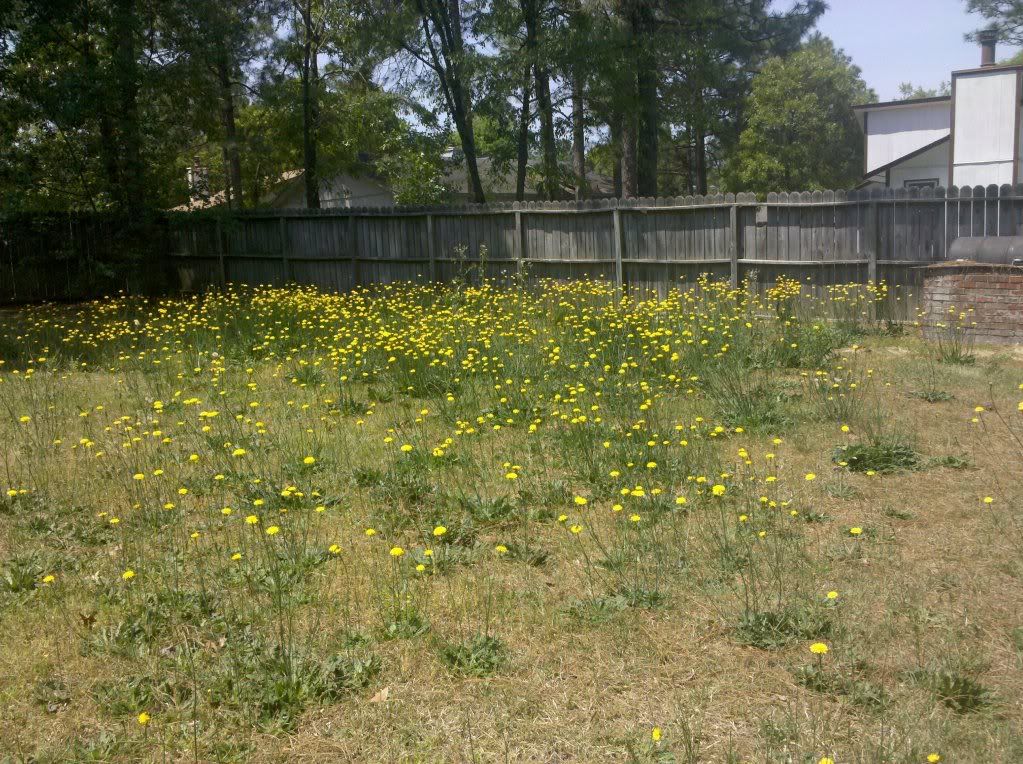
Hubby has been on travel for a little while but now he is home and it is time to get cracking. I will admit that we have a brown thumb and when he is gone I don't take care of the yard as I should. This is evident by the picture of our back yard:

Photobucket

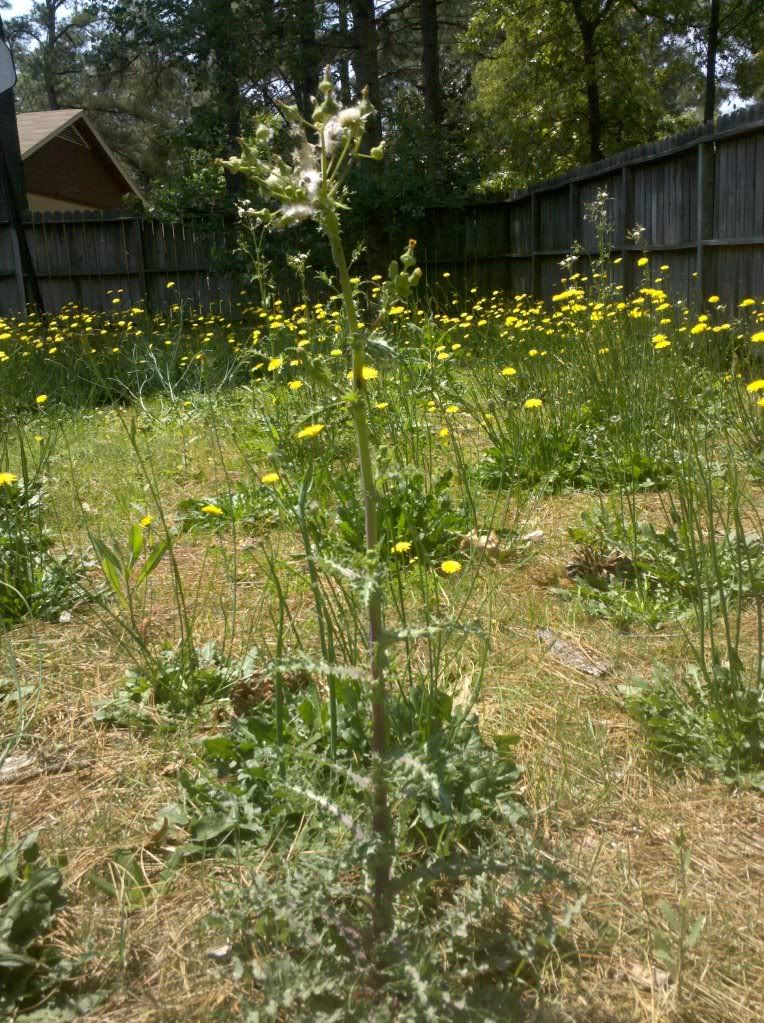
Ok luckily we have nice tall fences so our neighbors don't know that we are probably the cause of the neighborhood dandelion epidemic. The font yard looks great but it is just a nightmare in the back. Did you know if you let dandelions grow for awhile they turn very tree-like:

Photobucket

SCARY! Well I snuck in a nap today so after Thing 1 and Thing 2 are in bed I am planning on cranking out some zipper headbands. My co-workers have been asking for some and I think it would be something for office morale! As I work on them tonight I will take pics and post a tutorial. Have a good one!

Monday, April 19, 2010

The show was AWESOME!!!

It was a surreal experience. There was mad hatter punch and lots of goodies. The Fayetteville Museum of Art put on a great show thanks to the Feral Arts Collective. I tried to get my costume on but that was a whole different blog post on my adventures of buying a dress. (soon to come) Well enough Said here are some pictures (Thanks to Christina Cole for the pics!):


The super cute place settings


That is my table in the top left :) Me, hubby, tall buddy Ericka, and my two awesome bosses! I have some really supportive people in my life that ROCK!


It was a really wired thing to listen in on people looking at my art...

My Pieces:

Sunday, April 11, 2010

Taking a Break

Ugh I needed to take a break from pretending to be a serious artist. I can only think deep and put so much expression into an object before my head explodes. So I made this:


I have been coveting headbands like this with the little zipper rosettes for awhile. I just so happen to have a HUGE bag of vintage zippers that were given to me out of my Nana's stash. I think I got my stash addiction from my Nana. I have fond memories of falling to sleep with her sewing in the same room. Anyways, here is a picture of the details.


On an exciting note... My hubby bought me a new Motorola Droid! I have been hinting that I really want one for the past few months. It should come in the mail in the next day or two. Yippie

Long time no see...

Yes I know, I have been a very bad blogger. I went back to work full time so I had to drop some of my digital scrapbooking commitments. This does make me sad but I have to admit I am excited to be back in the workforce. Through a series of exciting events (one of which involved shots of Limoncello) I stumbled upon my job as an assistant to an optician. Basically, I now make and sell glasses. It is a great job and I am happy to be there.

On the art front, I am super duper excited because I am doing my very first big-girl art show in a real Museum. On Saturday April, 17th the Fayetteville Museum of Art is doing a fundraiser in the theme of Alice in Wonderland.

The daytime events are all kid friendly and look like a ton of fun. That night there is an adult costume party and that is where local artist with the Feral Arts Collective are being featured. I am excited to be included in this group of funky people. This show is a big step for me. My goal is to prove to myself and other people that the line between crafter and artist can be blurred. This being said I still believe it takes a certain person, talent, and motivation to create art. Why can't someone create art even if they are unable to commit to the lifestyle of being an artist? Well enough on my soapbox, we will just see how the show goes! Here are some preview pics of the pieces I am putting in the show:


I will post a ton of pictures from the event. I am really excited, I just have no idea what to wear....